Whenever you create a new works order, or recall an existing one, Micronet displays the Works Order Creation Header screen where you enter the main details of the works order.
Refer to "Creating a New Works Order" or "Recalling a Works Order".
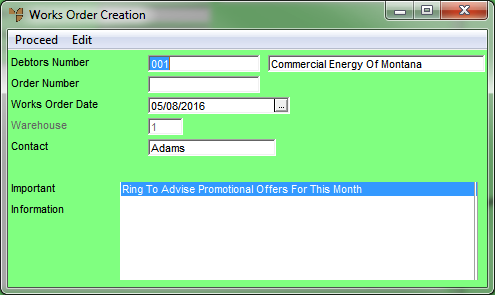
Micronet displays the Works Order Creation Header screen.
|
|
Field |
Value |
|
|
Debtors Number |
Micronet displays the ID and name of the debtor you entered on the Works Order Creation screen. The debtor's number defaults to AUTOKIT for works orders created via the Auto Kitting program, and to TRIALKIT for works order created via the Trial Kitting program. |
|
|
Order Number |
Enter the works order number. |
|
|
Works Order Date |
Micronet displays today's date as the works order date. You can change this date if required. |
|
|
Warehouse |
Enter or select the warehouse that the items for this works order are to be supplied from. |
|
|
Contact |
Enter the name of the warehouse contact person. |
|
|
Important Information |
Micronet displays any added text in the Debtors master file that is assigned to display as important information on works orders. |
Micronet redisplays the Works Order Creation screen.